Built for Possibility
Create something you're proud of.
Whether you're just starting out or taking things to the next level, we have everything you need to connect, engage, & make something truly yours.
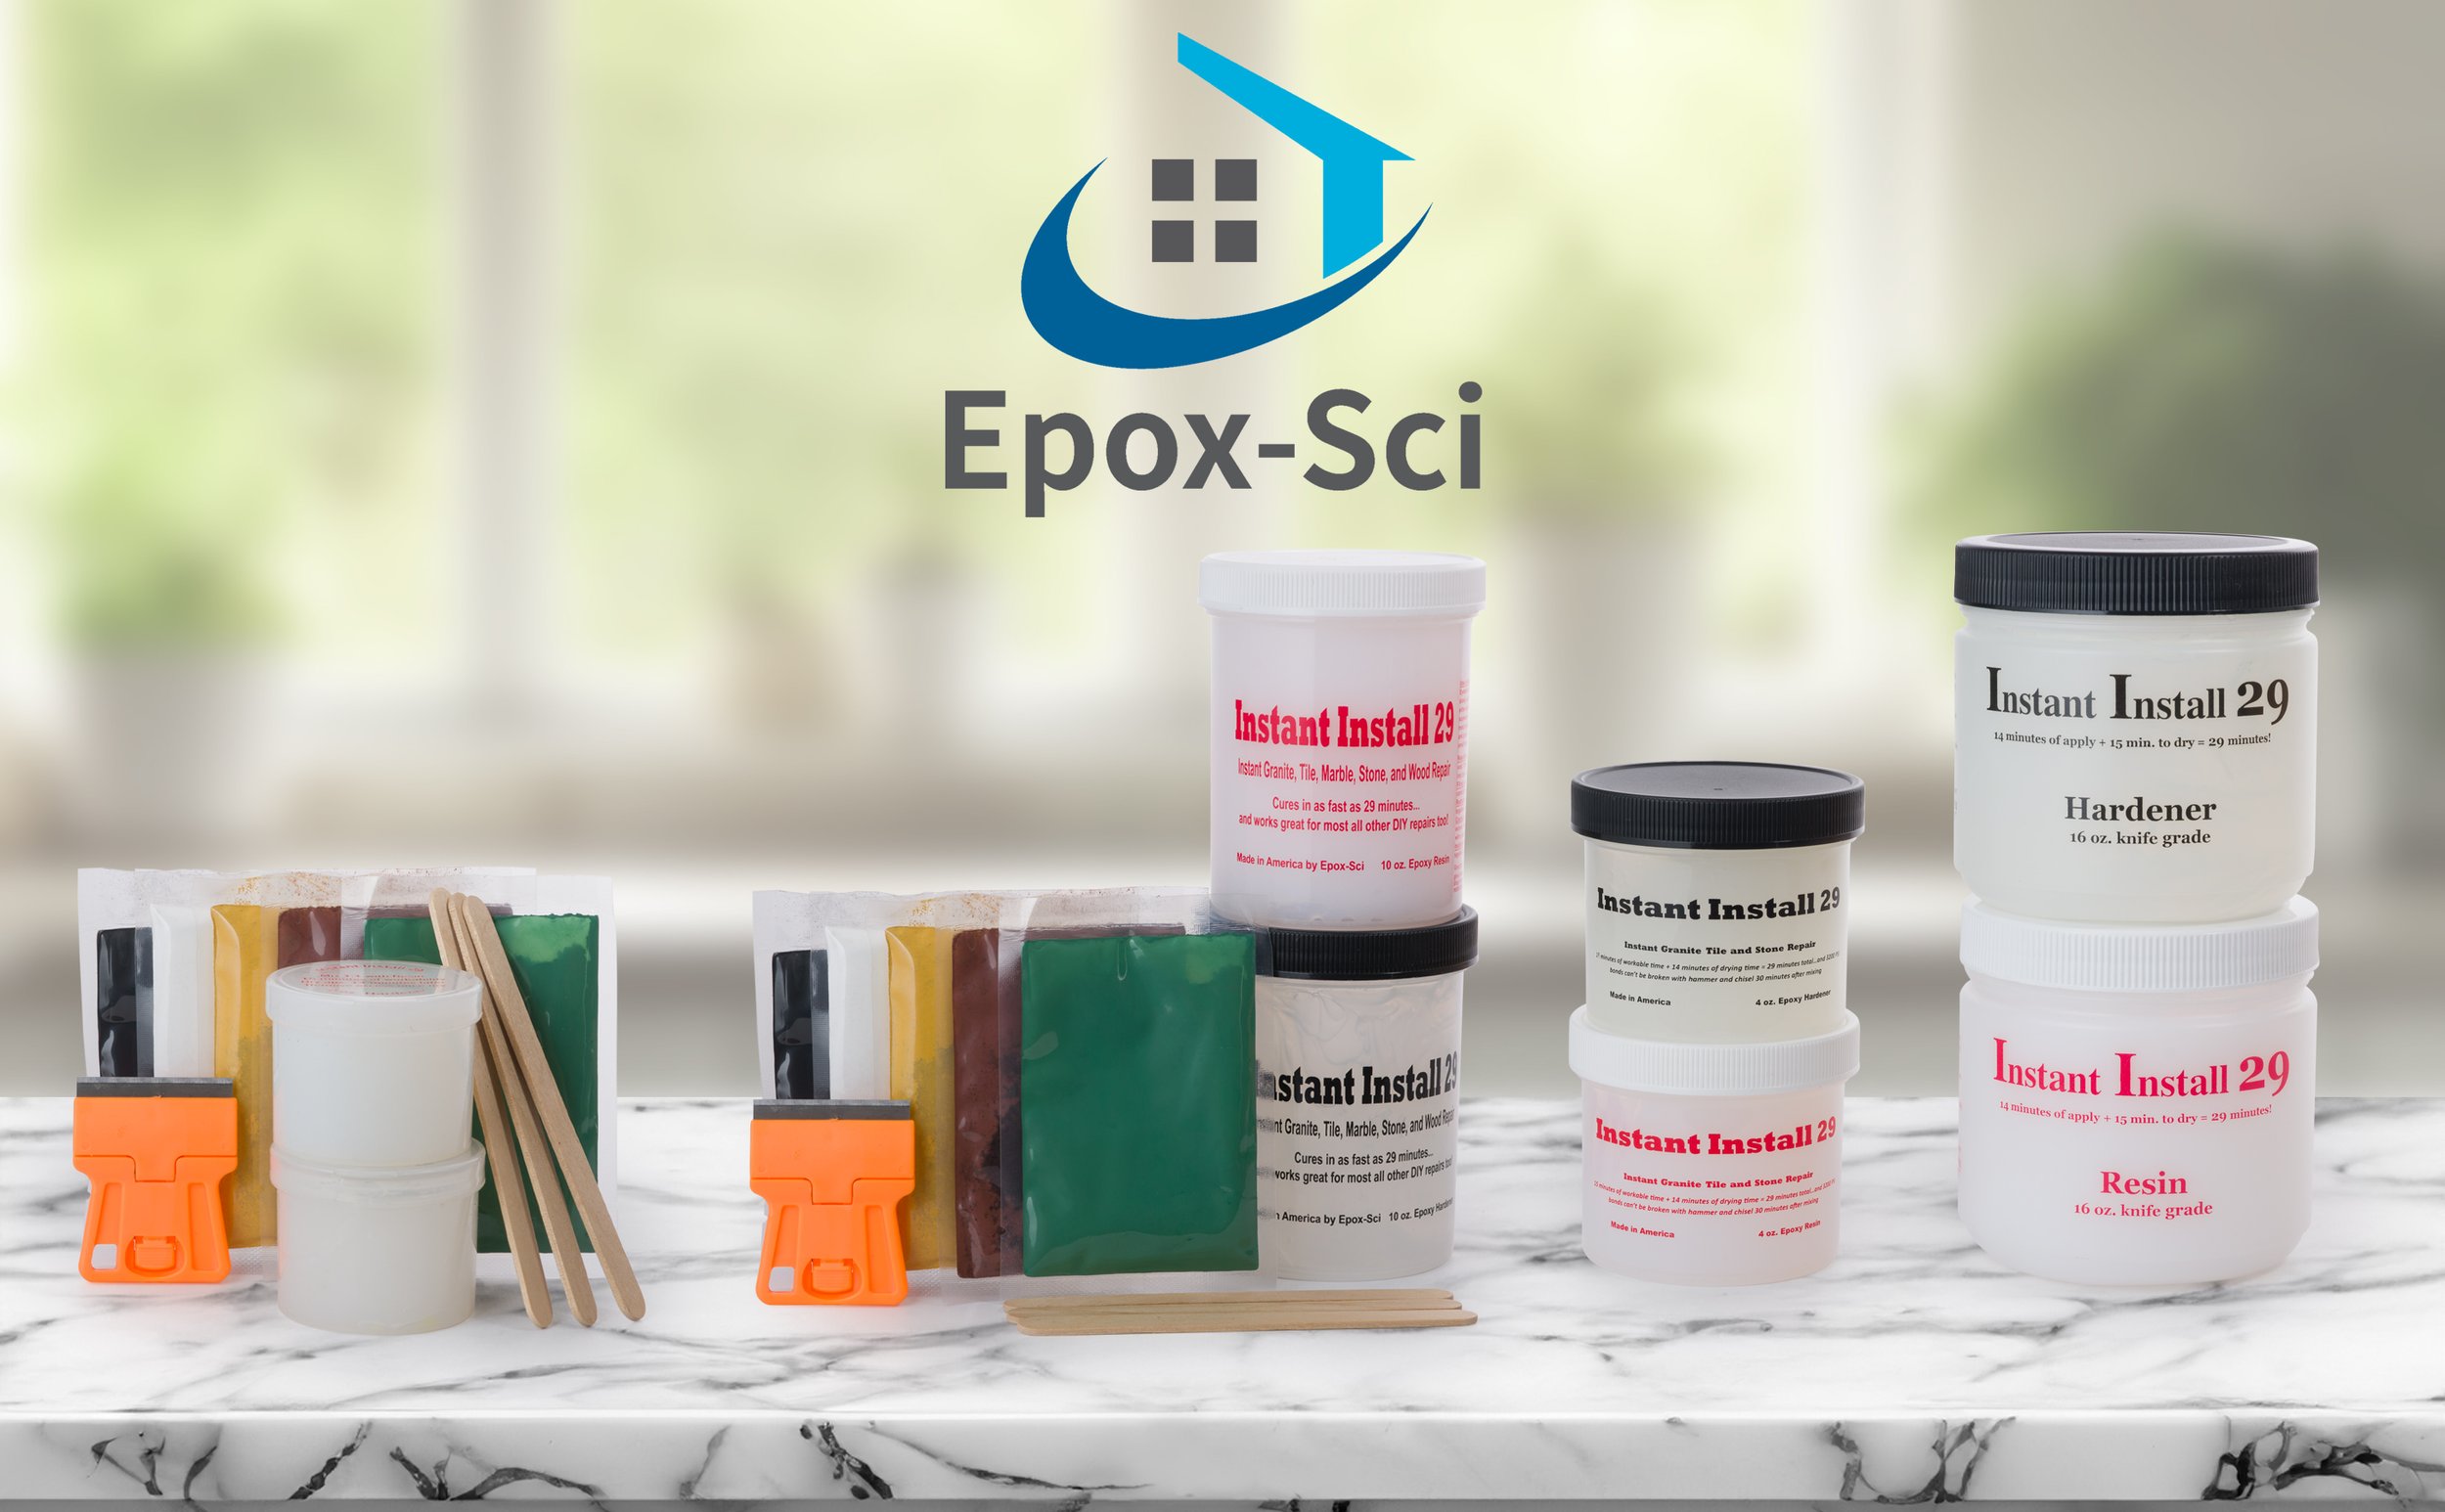
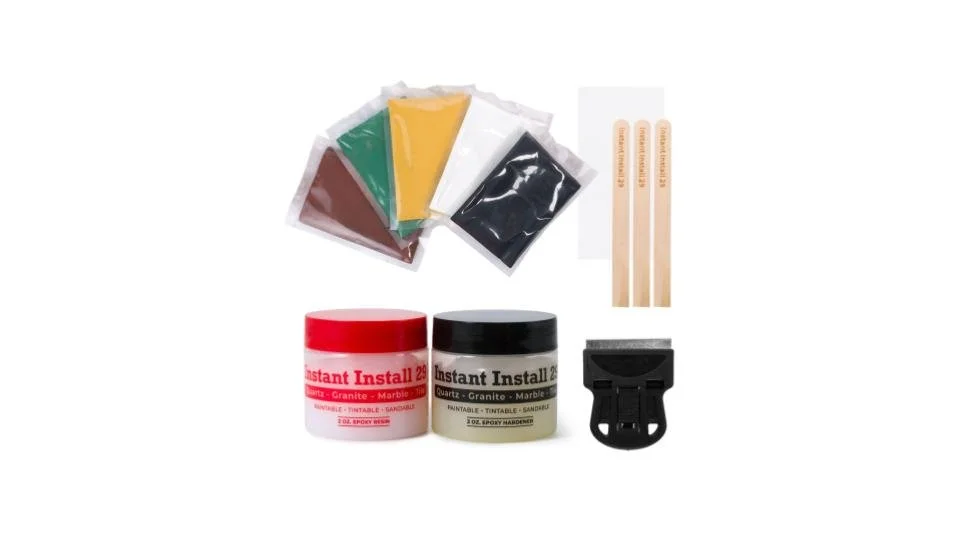
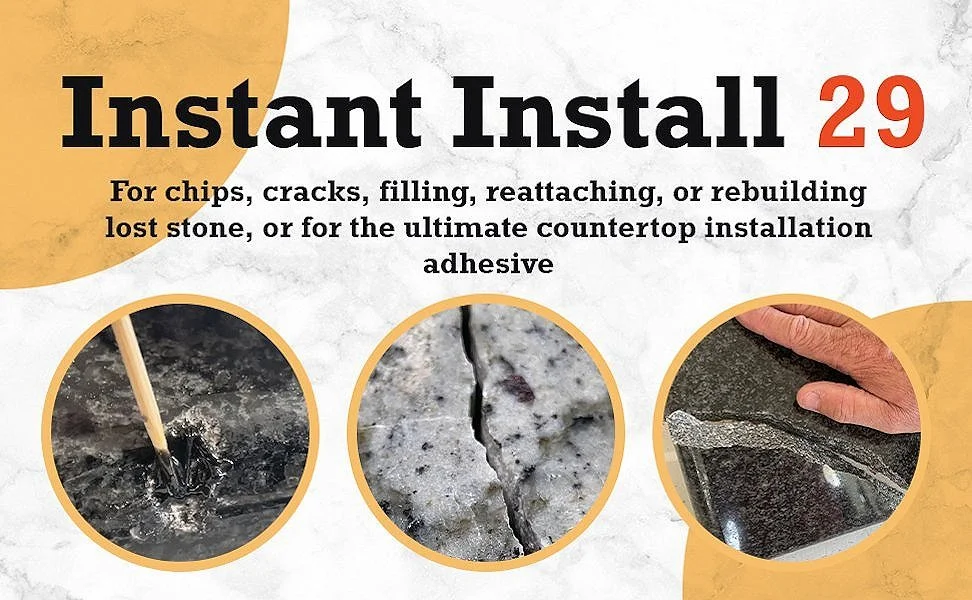
Instant Install 29 - Permanent Epoxy Repair Kit


Our Products
20 oz

20 oz Complete Kit
4 oz Complete Kit
Intended Uses & Repair-Specific Instructions
-

Rebuilding Missing Chips
Note: Reattaching broken pieces rarely requires tinting unless some pieces are missing.
1. Remove protective film that forms over hardener. Dip out equal amounts of hardener & resin using individual dipping sticks.
2. Mix hardener & resin together thoroughly on a flat surface (e.g., paper plate). If needed, add in small amounts of EZ-Tint (included in Complete Kits, also sold separately) to mixed epoxy until desired color is achieved.
3. Fill chip. Try not to overfill.
4. On profiled edges/vertical repairs, tape down shaping strip (included with Complete Kits & EZ-Tint) over epoxy.
5. Allow 30-45 minutes for epoxy to dry.
6. Slowly peel back shaping strip.
7. Make sure epoxy is dry-to-touch & razor off dried excess. Epoxy won’t stick to smooth surfaces.
8. Epoxy will cure to a glossy finish. For a matte/travertine-type finish, razor dried surface.
-

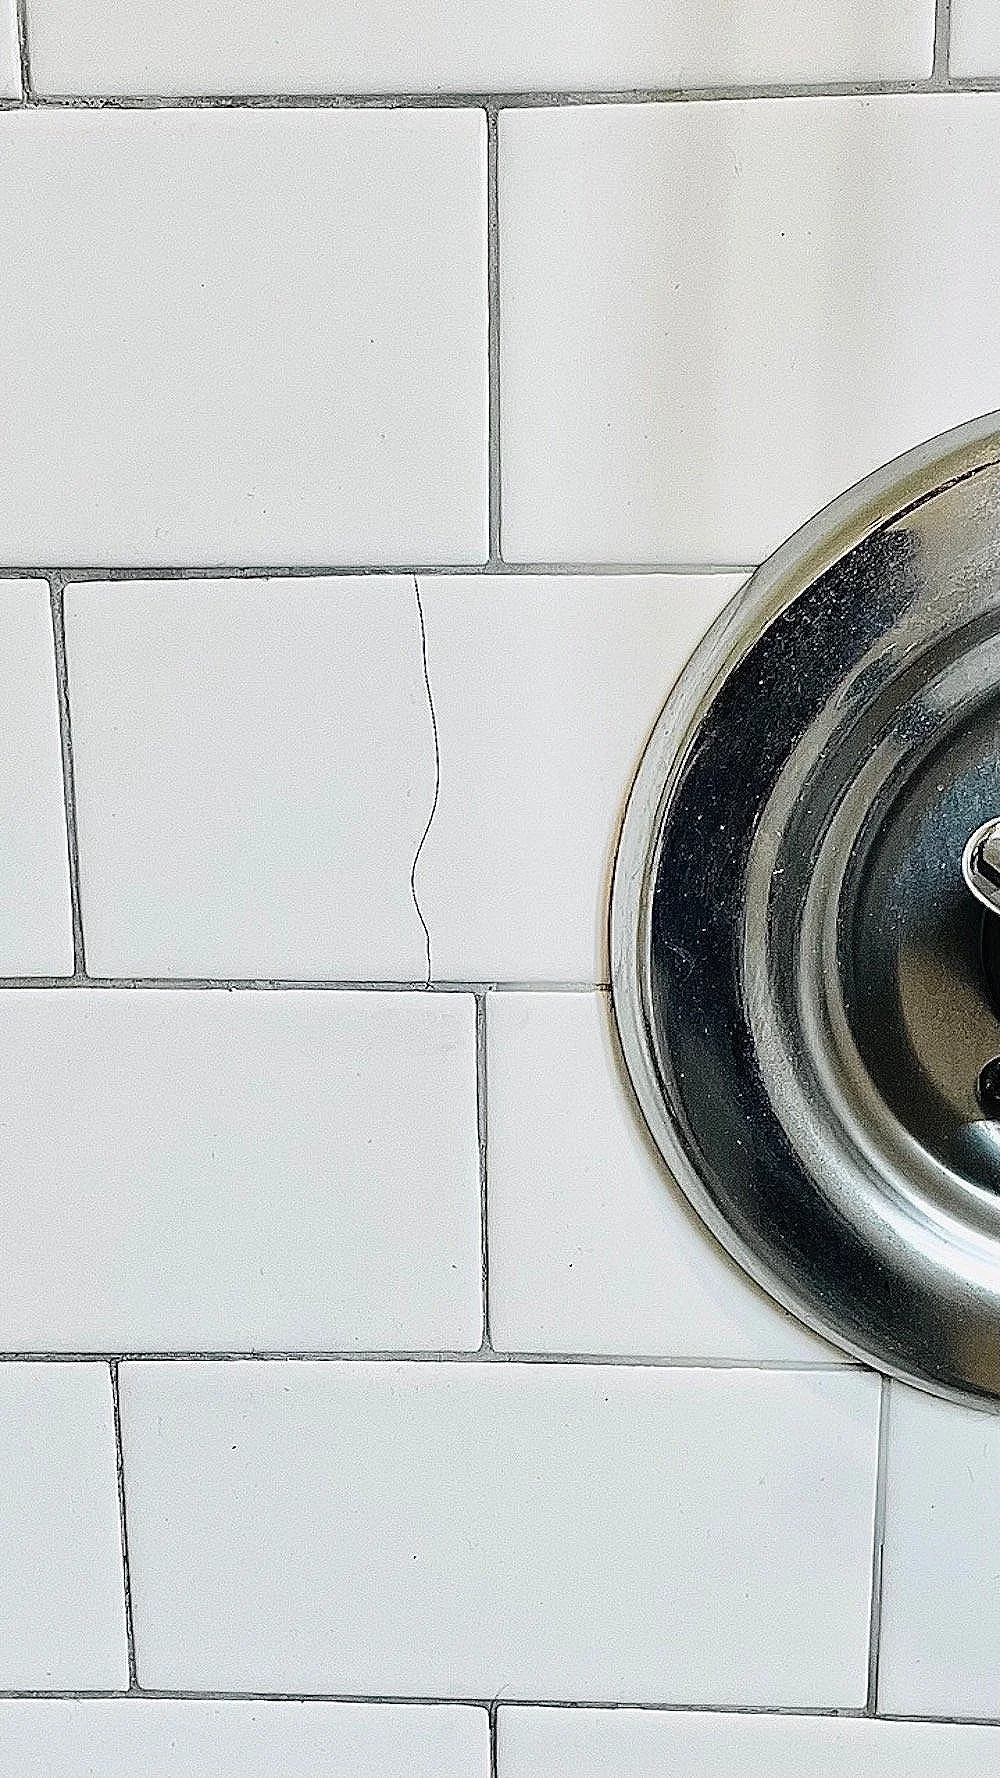
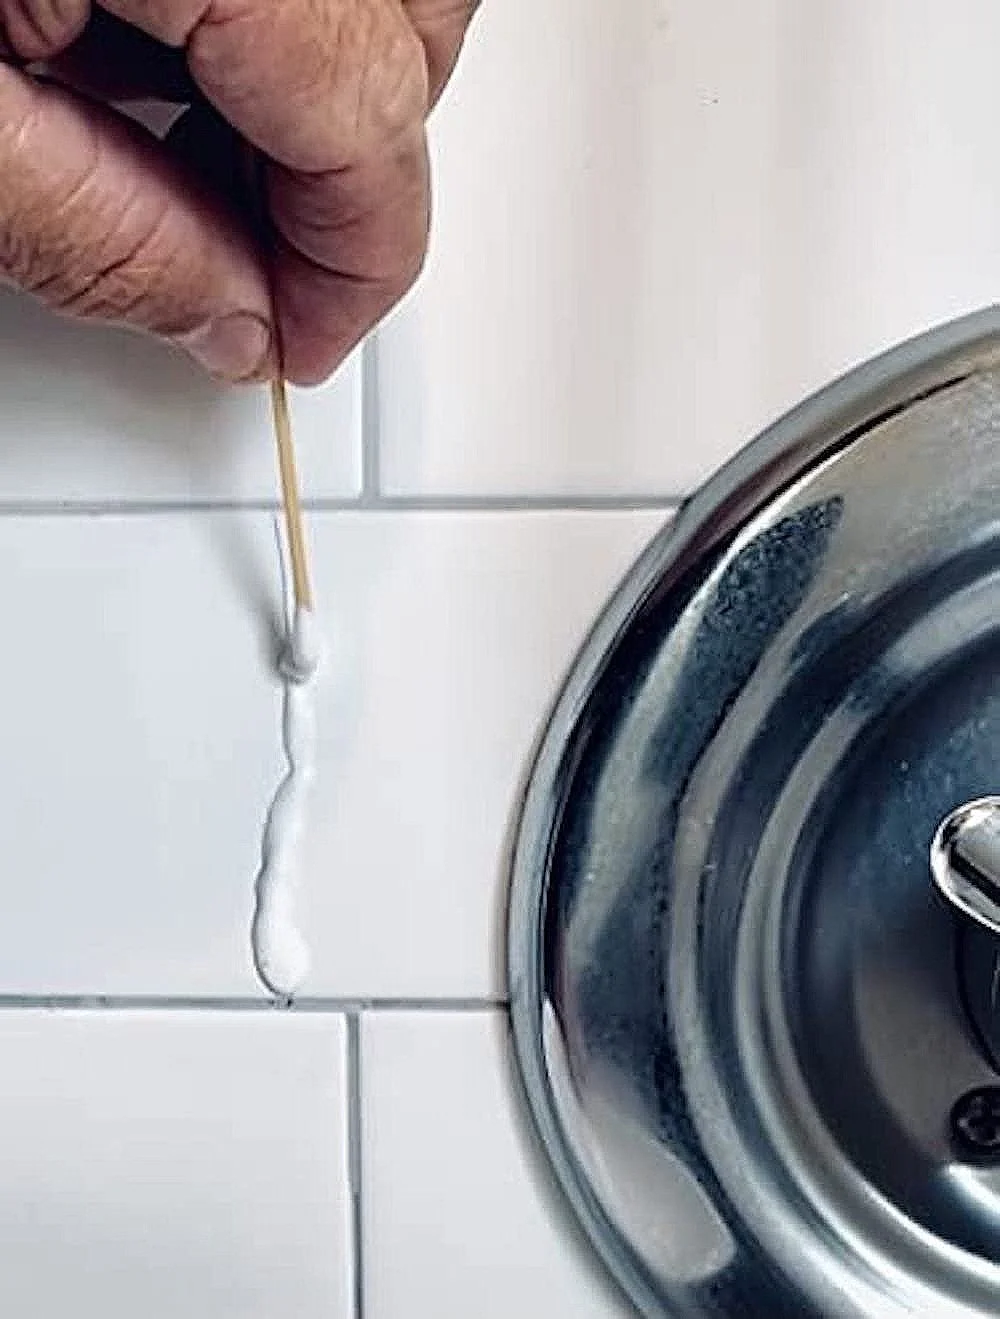
Repairing Horizontal or Vertical Cracks
Note: Epoxy may need to be forced into finer cracks using a plastic putty knife.
1. Remove protective film that forms over hardener. Dip out equal amounts of hardener & resin using individual dipping sticks.
2. Mix hardener & resin together thoroughly on a flat surface (e.g., paper plate).
3. Add in small amounts of EZ-Tint (included in Complete Kits, also sold separately) to mixed epoxy until desired color is achieved. Use a plastic putty knife for large cracks. Try not to overfill.
4. On vertical cracks (e.g., walls), tape down shaping strip (included with Complete Kits & EZ-Tint) over epoxy. Using shaping strip on flat/horizontal cracks is optional as epoxy will self-level.
5. Allow 30-45 minutes for epoxy to dry.
6. Slowly peel back shaping strip.
7. Make sure epoxy is dry-to-touch & razor off dried excess. Epoxy won’t stick to smooth surfaces.
8. Epoxy will cure to a glossy finish. For a matte/travertine-type finish, razor dried surface.
-

Countertop Installation
Note: No joint line taping is needed as dried epoxy doesn’t stick to smooth surfaces.
1. Remove protective film that forms over hardener.
2. Dip out equal amounts of hardener & resin using individual dipping sticks.
3. Mix hardener & resin together thoroughly on a flat surface (e.g., paper plate).
4. If needed, add in small amounts of EZ-Tint (included with Complete Kits, also sold separately) to mixed epoxy until desired color is achieved. If joint lines will be tight, tinting isn’t necessary.
5. Apply epoxy to one or both edge(s).
6. Clamp stone tightly for maximum bond strength.
7. Allow 30-45 minutes for epoxy to dry.
8. Make sure epoxy is dry-to-touch & razor off dried excess. Epoxy won’t stick to smooth surfaces.
9. Epoxy will cure to a glossy finish. For a matte/travertine-type finish, razor dried surface.


Benefits & Features
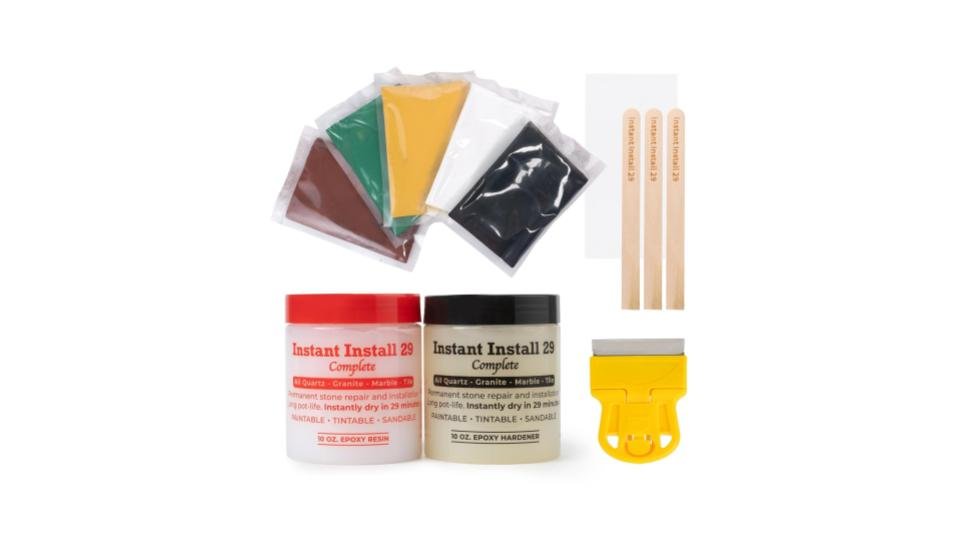
Available in 20 oz Complete Kit, 20 oz, & 4 oz Complete Kit sizes
Can be used with any natural or man-made stones (e.g., granite, marble, quartz, tile)
Do-it-yourself (DIY) friendly with professional results
Forgiving 15-minute workable time
Non-toxic/food-safe formula
Permanent bond
Quick 14-minute drying time
Quick-set epoxy
Tint-able with EZ-Tint (included with Complete Kits, also sold separately) for easy color matching
Two-part epoxy: hardener & resin
Mixing & Tinting Instructions
(EZ-Tint included with Complete Kits, also sold separately)
-

Step 1
Measure out & mix equal portions of hardener & resin.
Note: Tinting is optional. However, if epoxy will be visible, tinting is required, as tint masks any yellowing or other discoloration that may occur over time.
-

Step 2
Slowly add in tint to mixed epoxy.
Note: If using white tint, use equal parts hardener, resin, & tint to prevent any future yellowing or discoloration. For darker colors, less tint is needed.
-

Step 3
Add tint until desired color is reached.
Note: Black or white tint can be added to darken or lighten shade of epoxy. Small specks of tint can also be added in after epoxy is applied to repair to create multiple colors & striations that are often found in stone.
-

Step 4
Razor away dried excess epoxy. Razoring cured surface will matte finish if desired. If glossy surface is desired, take care not to scrape surface with razor.
Note: Complete Kit & EZ-Tint purchases include a 2” x 4” clear shaping strip. Using the shaping strip is optional on flat surface repairs. On vertical surfaces, the shaping strip helps to keep epoxy in place. On profiled edges like countertops, the shaping strip shapes epoxy to exact profile. Use painter’s tape to tape the strip down & keep it in place. In approximately 20 minutes, lift one edge of the shaping strip & ensure epoxy is dry-to-touch. Once epoxy has dried, the shaping strip won’t stick to it & peels away easily.
What Our Customers Say